DNN has the ability to assign roles to users, to create business-specific roles, and show/hide content based on those roles. The three basic roles are Administrators, Registered Users, and Subscribers. Administrators are your web experts who need access to the back end of things. There is also Host/SuperUser access, which should be reserved for the website builder and expert developers. The Registered User role is the basic name for people who have an account on your site. In many cases, this is for member-based organizations. Subscribers are non-members who have subscribed to your content, if that feature is turned on.
Some businesses may have other roles they need to create, such as content editors, roles based on specific membership levels or courses taken. There is no limit to the number of roles a site can have.
How To Create a Role:
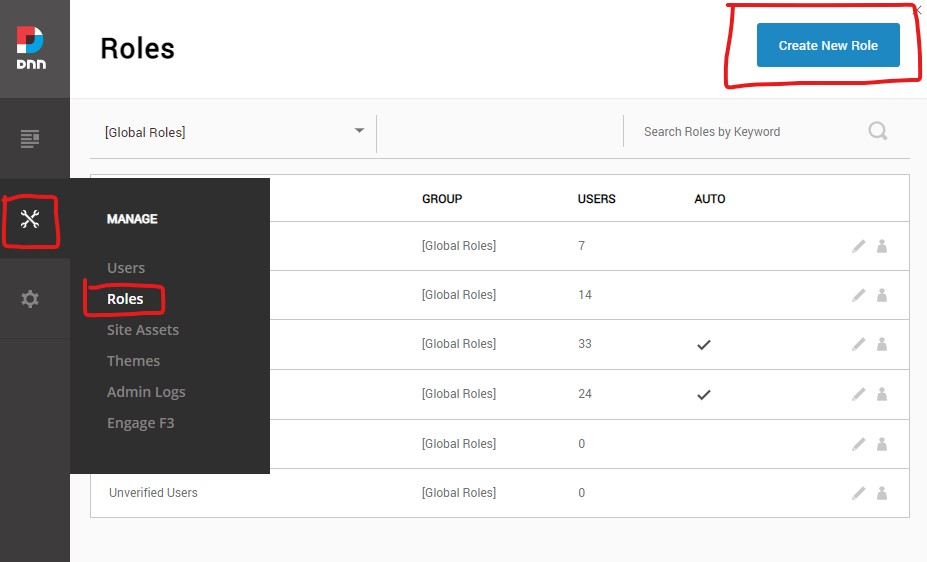
Hover over the wrenches icon and click on Roles. Then click on Create New Role.

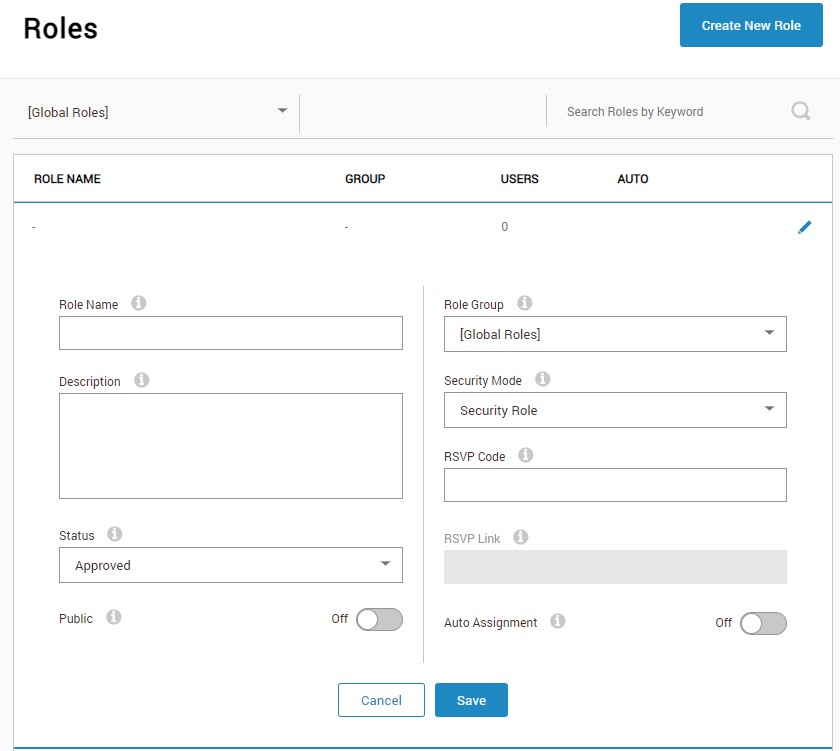
Give the role a name and description that makes sense for your site and the purpose of the role. Under Status - if a user can opt-in to this role and will be automatically approved, then keep it as APPROVED. But if a user must go through an approval process, then change the dropdown to PENDING. For users to be able to opt-in, the PUBLIC slider must be turned on.
Under Role Group - in most cases, you will keep that as Global.
Under Security Group - if you are using the role to show/hide content, then keep it as Security Role.
Auto Assignment - turn this on if you want an activity to assign a role to a user, such as registering on the site auto assigns a user to the Registered User and/or Member role or purchasing something from the store auto assigns the user to that customer segment.

How To Manually Assign a Role to a User
Hover over the wrenches icon and click on Users
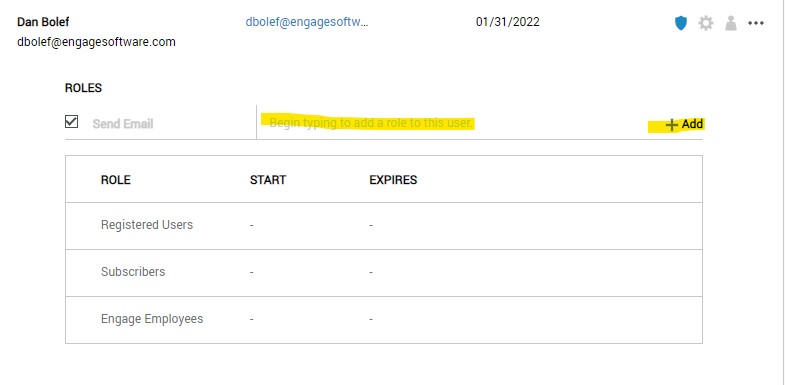
Find the user you want, then Click on the badge icon (when hovered, it says “Security Roles”)

Begin typing the role you want to add, ie Member, and then click Add

For any questions and/or assistance with your DNN site, please reach out to sales@engagesoftware.com